Pokemon, Super Mario, Harry Potter, Star Wars, Minecraft, and Splatoon characters and story lines have been incorporated into our every day lives.
Examples: Sometimes Ash Ketchum, a Pokemon trainer, will meet us at the grocery store and he and his Pikachu will come home for lunch. When he runs around the bases at baseball, he make Mario jumping sounds as he hits the bases. While sword battling his father yesterday, he used the force to throw his father to the ground (good catch dad). This morning he used Wingardium Leviosa to help me lift a 5gal bucket of water for the garden. Last weekend our water ballon fight became an epic Splatoon Battle with the incorporation of Super Soakers. While gardening today Max spent his time with his crafting table, fashioning his Minecraft weapons to use to build himself some shelter.
Max lives in a wonderful world and it is my job to help him develop it. SO! We make things. Over the past few months we have been fashioning Minecraft weapons. They are fairly simple to make, and only take about 15 minutes. I've had a few friends ask for the steps, so here is a quick tutorial.
Items needed:
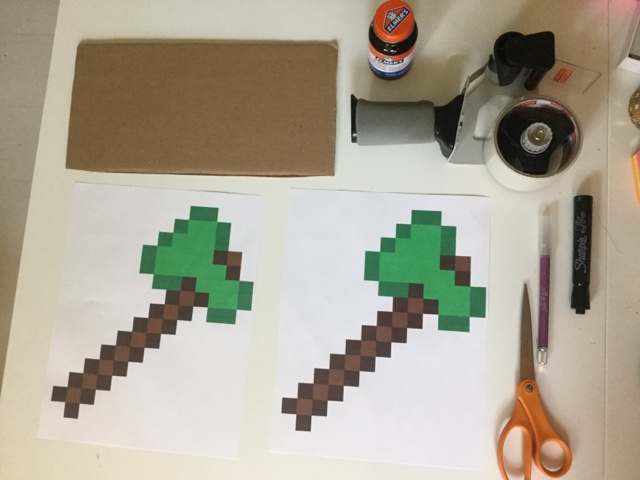
2 printed images of selected item
1 scrap piece of cardboard from whatever amazon package was just delivered
1 pair of scissors
1 exacto knife
1 sharpie or black marker
rubber cement
clear packing tape
Step 1:

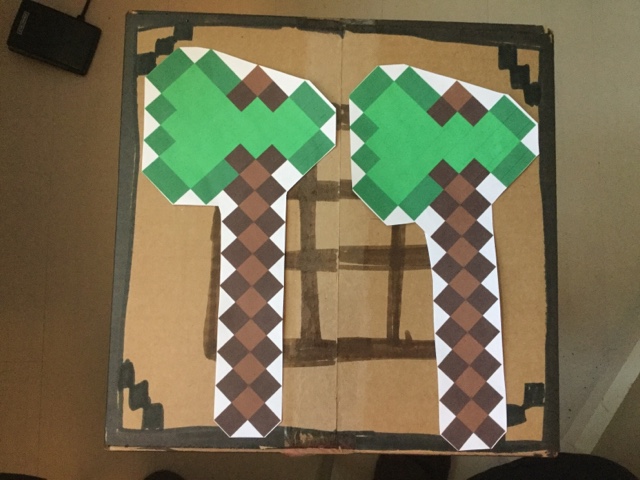
Google search Minecraft weapon through images, once selected download image. You may need to edit the image in someway, I use a Macbook Air and find that the preview program is all I need to make adjustments. Through the print option you can adjust the image size, I try to make it as big as I can fit on one page without too much distortion. Sometimes you may need to flip the image. This can be accomplished in Preview program, on the Tools drop down, select flip horizontally. Scale both images to the same % (picture in tutorial scaled to 300%). I started this tutorial with 2 images that were the same, make sure when you print that the images mirror each other when placed side by side (There is a photo below, Step 5 shows a mirrored image)
Step 2:

Cut out both images. I first started cutting each square individually, this took much longer, and also was uncomfortable for the 6 year old to hold, as the handles became pointy. So I started cutting along the diagonal, making basic shapes. This made the process much faster, and allowed for more playtime instead of make time for my son.
Step 3:
Once the 2 sides are cut out, paste on image onto a piece of cardboard. I find using rubber cement the easiest, it is the cleanest as it comes with a brush, and doesn't bubble the painted image the way glue can. Rubber cement allows for a temporary or permanent bond, this project will be covered in packing tape by the end, so a temporary bond will be just fine. Which is helpful for those who may need to reposition the image on the cardboard for the best fit. I always seem to have a surplus of cardboard, either from my home business, a package send from Grammy, or Amazon. Anything roughly the size of a 1/2 sheet of paper should be enough.
Step 4:
Using an exacto knife, cut the cardboard around the image. I make models regularly for my theater life, so I try and swap out blades at the end of each large project. If you find your cuts aren't very clean try changing out your blade, a new blade will produce a cleaner cut, and will be easier to cut through. I cut on a Alvin cutting mat, but another layer of cardboard will work too. Just make sure you have a layer of protection under your cutting area, otherwise you may damage your work surface.
Step 5:
Here is where I realixed I forgot to flip my image..... no one's perfect.... If the images don't fit, try a flip! So after I recut the image I added some paste onto the additional image on the opposite side of cardboard. Trim any overhanging area, if needed.
Step 6:
Trace around the outside of the images with a black marker. I like the Sharpie Flip cart markers, I started using regular sharpie, but the tip was small and aren't really the best option for coloring in the square. The Flip Chart Sharpies however, give a nice line edge and cover more area. I color in each of white squares and make sure all the edges have a black line around them.
Step 7:
Wrap in clear packing tape. Some of the tools have angles and diagonals. I find that placing a cut at each corner allows for more control while taping. Simply cut the tape to the corner or turn and fold in it's own angle. Cover any missed places and check the other side.
Step 8:
Give to 6 year old and watch the imagination play. Max likes to make the tools with me, and today actually started making the "make" sound that happens while forging a metal tool. It was very sweet.
I hope this was helpful, for anyone looking for a rainy-day project. This project cost me some paper, cardboard, printer ink, a bit of paste, packing tape and 15 minutes. All these items I had in house and added to our rainy day indoor morning.
Happy Crafting!


Thanks so much! I have been making items with my son for years, and a friend finally convinced me to start sharing our projects. I hope you check back for more!
ReplyDelete